
.NET Core を Linux にデプロイしてみた
以前に投稿したApache編のNginx編になります。最後にリンク貼っておきました。
基本的な流れは似ておりますが少し異なる部分もありました。
環境
開発環境 Apache編と同じ
- Windows 10
- Microsoft Visual Studio Community 2019 Version 16.4.2
- ASP.NET Core Webアプリケーション
公開サーバー
- VPS WebARENA Indigo 安い!(笑)
- CPU 2vCPU
- SSD 40GB
- メモリ 2GB
-
月額699円(税込)1時間当たり1.1円(税込)初期料金無料
- CentOS Linux release 7.7.1908 (Core)
- Nginx version: Nginx/1.17.8
公開までの手順
ASP.NET Core Webアプリケーションの開発 PC作業(Apache編参照)
今回はLinuxで公開できることの確認が目的なのでVisual Studio のウィザードでASP.NET Core MVCアプリケーションを作成した
公開サーバーの準備 Linux作業
WebARENA Indigo に仮想マシンの作成(投稿割愛)
MSのサイトを参考に以下進める

「ASP.NET Core ランタイムをインストールする」までは Apache編と同じ。
Nginx のインストール
この内容は前に投稿済みです。参照下さい。

アプリ発行フォルダにパッケージする PC作業 (Apache編参照)
公開サーバーにアプリケーションをデプロイ PC作業(Apache編参照)
公開用にDNSの設定
ドメインもタダではないのでサブドメインで設定。検証用だし。
Nginxリバースプロシキーの設定 Linux作業
CentOS 6 のリバースプロシキーの設定経験から /etc/nginx/conf.d/ 配下に構成ファイルを作成してみた
 [root@i- conf.d]# cat /etc/nginx/conf.d/netcore2-nginx.conf
server {
        listen  80;
    server_name   yyy.domain *.yyy.domain;
    location / {
        proxy_pass         http://localhost:5000;
        proxy_http_version 1.1;
        proxy_set_header   Upgrade $http_upgrade;
        proxy_set_header   Connection keep-alive;
        proxy_set_header   Host $host;
        proxy_cache_bypass $http_upgrade;
        proxy_set_header   X-Forwarded-For $proxy_add_x_forwarded_for;
        proxy_set_header   X-Forwarded-Proto $scheme;
    }
}
Nginx の構成確認 OK
[root@i- nginx]# nginx -t
nginx: the configuration file /etc/nginx/nginx.conf syntax is ok
nginx: configuration file /etc/nginx/nginx.conf test is successful
ブラウザから公開できたか確認
まず公開サーバーのLinuxにてアプリを起動する
[root@i- netcore1]# dotnet ./netcore-web.dll
info: Microsoft.Hosting.Lifetime[0]
      Now listening on: http://localhost:5000
info: Microsoft.Hosting.Lifetime[0]
      Application started. Press Ctrl+C to shut down.
info: Microsoft.Hosting.Lifetime[0]
      Hosting environment: Production
info: Microsoft.Hosting.Lifetime[0]
      Content root path: /var/www/netcore1
クライアントブラウザから urlを入力してアクセスしてみる
http://yyy.domain
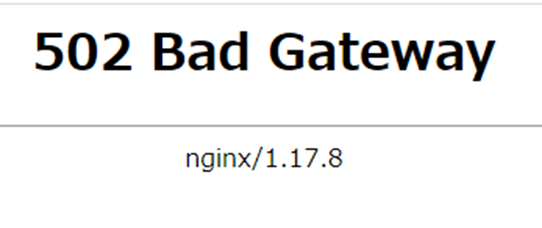
リバースプロシキーNginx のログを見るとNginxまではリクエストは届入れいるのだが、その先のKestrel に転送されてない様だ。Indigo管理コンソールにてファイアウォールの設定を調整してみたのだがダメだった。
[root@i- ~]# cat /etc/selinux/config
-----------------------------------------------
SELINUX=disabled
-----------------------------------------------
Nginxで http接続確認出来たので、Nginxの自動起動設定しておく
[root@i- conf.d]# systemctl enable nginx
Created symlink from /etc/systemd/system/multi-user.target.wants/nginx.service to /usr/lib/systemd/system/nginx.service.
Nginx がKestrel プロセスを管理する様に設定 Linux作業
[root@ip- netcore1]# dotnet netcore-web.dll
この様に毎回 dll ファイルを起動するのは非現実的
Nginxリバースプロシキーにアクセスが来たら自動でプロセスが起動するようにデーモンを起動しておく
参考ページは Ubuntu用なので 既稿のAWSの Centos Apache の時と同じにしてみた。
[root@i- netcore1]# cd /etc/systemd/system
[root@i- system]# vi kestrel-netcore-web.service
[root@i- system]# cat kestrel-netcore-web.service
[Unit]
Description=Example .NET Web API App running on CentOS 7

[Service]
WorkingDirectory=/var/www/netcore1
ExecStart=/usr/bin/dotnet /var/www/netcore1/netcore-web.dll
Restart=always
# Restart service after 10 seconds if the dotnet service crashes:
RestartSec=10
KillSignal=SIGINT
SyslogIdentifier=dotnet-example
User=apache ← ?だがとりあえずこのままで。
Environment=ASPNETCORE_ENVIRONMENT=Production

[Install]
WantedBy=multi-user.target
[root@i- ~]# systemctl start kestrel-netcore-web.service
[root@i- ~]# systemctl status -l kestrel-netcore-web.service
● kestrel-netcore-web.service - Example .NET Web API App running on CentOS 7
Loaded: loaded (/etc/systemd/system/kestrel-netcore-web.service; disabled; vendor preset: disabled)
Active: active (running) since 日 2020-02-02 15:01:19 JST; 10s ago
Main PID: 4083 (dotnet)
CGroup: /system.slice/kestrel-netcore-web.service
mq4083 /usr/bin/dotnet /var/www/netcore1/netcore-web.dll

2月 02 15:01:20 i- dotnet-example[4083]: warn: Microsoft.AspNetCore.DataProtection.KeyManagement.XmlKeyManager[35]
2月 02 15:01:20 i- dotnet-example[4083]: No XML encryptor configured. Key {} may be persisted to storage in unencrypted form.
2月 02 15:01:20 i- dotnet-example[4083]: info: Microsoft.Hosting.Lifetime[0]
2月 02 15:01:20 i- dotnet-example[4083]: Now listening on: http://localhost:5000
2月 02 15:01:20 i- dotnet-example[4083]: info: Microsoft.Hosting.Lifetime[0]
2月 02 15:01:20 i- dotnet-example[4083]: Application started. Press Ctrl+C to shut down.
2月 02 15:01:20 i- dotnet-example[4083]: info: Microsoft.Hosting.Lifetime[0]
2月 02 15:01:20 i- dotnet-example[4083]: Hosting environment: Production
2月 02 15:01:20 i- dotnet-example[4083]: info: Microsoft.Hosting.Lifetime[0]
2月 02 15:01:20 i- dotnet-example[4083]: Content root path: /var/www/netcore1
disabled が出てるのでサービスを一時停止後 自動起動の設定
[root@i- ~]# systemctl stop kestrel-netcore-web.service
[root@i- ~]# systemctl enable kestrel-netcore-web.service
Created symlink from /etc/systemd/system/multi-user.target.wants/kestrel-netcore-web.service to /etc/systemd/system/kestrel-netcore-web.service.

[root@i- ~]# systemctl start -l kestrel-netcore-web.service
[root@i- ~]# systemctl status -l kestrel-netcore-web.service
● kestrel-netcore-web.service - Example .NET Web API App running on CentOS 7
   Loaded: loaded (/etc/systemd/system/kestrel-netcore-web.service; enabled; vendor preset: disabled)
   Active: active (running) since 日 2020-02-02 15:05:50 JST; 5s ago
 Main PID: 4203 (dotnet)
   CGroup: /system.slice/kestrel-netcore-web.service
           mq4203 /usr/bin/dotnet /var/www/netcore1/netcore-web.dll

----------------------------------------------------------------------------
ログの表示は
[root@i- ~]# journalctl -fu kestrel-netcore-web.service
SSL 接続可能に Let’s Encrypt 導入 Linux作業
下を参考に設定

EPEL7をダウンロード
[root@i- ~]# wget -r --no-parent -A 'epel-release-*.rpm' http://dl.fedoraproject.org/pub/epel/7/x86_64/Packages/e/
-bash: wget: コマンドが見つかりません

[root@i- ~]# yum install wget
[root@i- ~]# wget -r --no-parent -A 'epel-release-*.rpm' http://dl.fedoraproject.org/pub/epel/7/x86_64/Packages/e/
リポジトリパッケージをインストール
[root@i- ~]# rpm -Uvh dl.fedoraproject.org/pub/epel/7/x86_64/Packages/e/epel-release-*.rpm
警告: dl.fedoraproject.org/pub/epel/7/x86_64/Packages/e/epel-release-7-12.noarch.rpm: ヘッダー V3 RSA/SHA256 Signature、鍵 ID 12345678: NOKEY
準備しています... ################################# [100%]
更新中 / インストール中...
1:epel-release-7-12 ################################# [100%]
最後にEPEL7を有効化
[root@i- ~]# yum-config-manager --enable epel*
EPEL が有効であることを確認できます
[root@i- ~]# yum repolist all
certbotのインストール
[root@i- ~]# yum install certbot python2-certbot-nginx
Let’s Encryptの証明書を取得・設定
[root@i- ~]# certbot --nginx
Saving debug log to /var/log/letsencrypt/letsencrypt.log
Plugins selected: Authenticator nginx, Installer nginx
Enter email address (used for urgent renewal and security notices) (Enter 'c' to
cancel): mailaddress@domain
Starting new HTTPS connection (1): acme-v02.api.letsencrypt.org

- - - - - - - - - - - - - - - - - - - - - - - - - - - - - - - - - - - - - - - -
Please read the Terms of Service at
'https://letsencrypt.org/documents/LE-SA-v1.2-November-15-2017.pdf.' You must
agree in order to register with the ACME server at
'https://acme-v02.api.letsencrypt.org/directory'
- - - - - - - - - - - - - - - - - - - - - - - - - - - - - - - - - - - - - - - -
(A)gree/(C)ancel: a

- - - - - - - - - - - - - - - - - - - - - - - - - - - - - - - - - - - - - - - -
Would you be willing to share your email address with the Electronic Frontier
Foundation, a founding partner of the Let's Encrypt project and the non-profit
organization that develops Certbot? We'd like to send you email about our work
encrypting the web, EFF news, campaigns, and ways to support digital freedom.
- - - - - - - - - - - - - - - - - - - - - - - - - - - - - - - - - - - - - - - -
(Y)es/(N)o: n

Which names would you like to activate HTTPS for?
- - - - - - - - - - - - - - - - - - - - - - - - - - - - - - - - - - - - - - - -
1: yyy.domain
- - - - - - - - - - - - - - - - - - - - - - - - - - - - - - - - - - - - - - - -
Select the appropriate numbers separated by commas and/or spaces, or leave input
blank to select all options shown (Enter 'c' to cancel): 1
Obtaining a new certificate
Performing the following challenges:
http-01 challenge for yyy.domain
Waiting for verification...
Cleaning up challenges
Deploying Certificate to VirtualHost /etc/nginx/conf.d/netcore2-nginx.conf

Please choose whether or not to redirect HTTP traffic to HTTPS, removing HTTP access.
- - - - - - - - - - - - - - - - - - - - - - - - - - - - - - - - - - - - - - - -
1: No redirect - Make no further changes to the webserver configuration.
2: Redirect - Make all requests redirect to secure HTTPS access. Choose this for
new sites, or if you're confident your site works on HTTPS. You can undo this
change by editing your web server's configuration.
- - - - - - - - - - - - - - - - - - - - - - - - - - - - - - - - - - - - - - - -
Select the appropriate number [1-2] then [enter] (press 'c' to cancel): 2
Redirecting all traffic on port 80 to ssl in /etc/nginx/conf.d/netcore2-nginx.conf

- - - - - - - - - - - - - - - - - - - - - - - - - - - - - - - - - - - - - - - -
Congratulations! You have successfully enabled https://yyy.domain

You should test your configuration at:
'https://www.ssllabs.com/ssltest/analyze.html?d=yyy.domain'
- - - - - - - - - - - - - - - - - - - - - - - - - - - - - - - - - - - - - - - -

IMPORTANT NOTES:
- Congratulations! Your certificate and chain have been saved at:
/etc/letsencrypt/live/yyy.domain/fullchain.pem
Your key file has been saved at:
/etc/letsencrypt/live/yyy.domain/privkey.pem
Your cert will expire on 2020-05-02. To obtain a new or tweaked
version of this certificate in the future, simply run certbot again
with the "certonly" option. To non-interactively renew *all* of
your certificates, run "certbot renew"
- Your account credentials have been saved in your Certbot
configuration directory at /etc/letsencrypt. You should make a
secure backup of this folder now. This configuration directory will
also contain certificates and private keys obtained by Certbot so
making regular backups of this folder is ideal.
- If you like Certbot, please consider supporting our work by:

Donating to ISRG / Let's Encrypt: https://letsencrypt.org/donate
Donating to EFF: https://eff.org/donate-le
nginx のconfファイルを自動でssl対応にcertbotが書き換えてくれた
[root@i- conf.d]# cat /etc/nginx/conf.d/netcore2-nginx.conf
server {
    server_name   yyy.domain *.yyy.domain;
    location / {
        proxy_pass         http://localhost:5000;
        proxy_http_version 1.1;
        proxy_set_header   Upgrade $http_upgrade;
        proxy_set_header   Connection keep-alive;
        proxy_set_header   Host $host;
        proxy_cache_bypass $http_upgrade;
        proxy_set_header   X-Forwarded-For $proxy_add_x_forwarded_for;
        proxy_set_header   X-Forwarded-Proto $scheme;
    }

    listen 443 ssl; # managed by Certbot
    ssl_certificate /etc/letsencrypt/live/yyy.domain/fullchain.pem; # managed by Certbot
    ssl_certificate_key /etc/letsencrypt/live/yyy.domain/privkey.pem; # managed by Certbot
    include /etc/letsencrypt/options-ssl-nginx.conf; # managed by Certbot
    ssl_dhparam /etc/letsencrypt/ssl-dhparams.pem; # managed by Certbot

}
server {
    if ($host = yyy.domain) {
        return 301 https://$host$request_uri;
    } # managed by Certbot


        listen  80;
    server_name   yyy.domain *.yyy.domain;
    return 404; # managed by Certbot
https アクセスの確認
http://yyy.domain → 自動で https:yyy.domain になった
証明書の自動更新の設定
[root@i- ~]# crontab -u root -e
no crontab for root - using an empty one
crontab: installing new crontab

[root@i- ~]# crontab -l
15 0,12 * * * root /usr/bin/certbot renew --no-self-upgrade
合わせて読んでください

まとめ
SELINUXにまたやられてしまった。
Apache 、Nginx それに加えて CentOS とUbuntu でリバースプロシキーの設定方法が違う。バラエティーに飛んでます。
アプリ開発もやってインフラ関係の設定もやって、そうしているうちにバージョンアップだ~なんだと
使ったことないけど、開発環境があらかじめ用意してくれてるのもあるみたい。それも、980円/月で。どうなんだろう?開発に集中できるのかな?


コメント